Furniture Insights
News
How to Rearrange a Modular Sofa: From Existing Setup to New Layout
To rearrange a modular sofa, identify which sections can move independently, check that the proposed arrangement is supported, and separate the modules using the correct release method. Move each section into position, reconnect any required fittings, and check the completed arrangement before using it. A loose ottoman, a connected seat module and a fixed chaise require different handling.
Start with the sofa you already own. Record its current arrangement before changing anything so that cushions and hardware remain associated with the correct sections. This also gives you a reference if the new layout does not work. The process should account for each module from its original position through to the final connection and seating check.
Record the Current Setup Before Separating Anything
Photograph the sofa and its accessible connections. Record each movable section on a simple sketch, using labels such as A, B and C. Keep the labels on the sketch or with the parts rather than applying untested adhesive to the upholstery.
For each section, note:
- Its current position and facing direction.
- The modules beside it.
- Any corresponding loose cushions.
- The location of connections that must be released.
If the instructions require fasteners to be removed, place them in a bag labeled for the relevant joint as they come off.
This record is particularly useful when several seat modules look alike. Matching upholstery does not establish that two sections have interchangeable arms, backs or connection points.
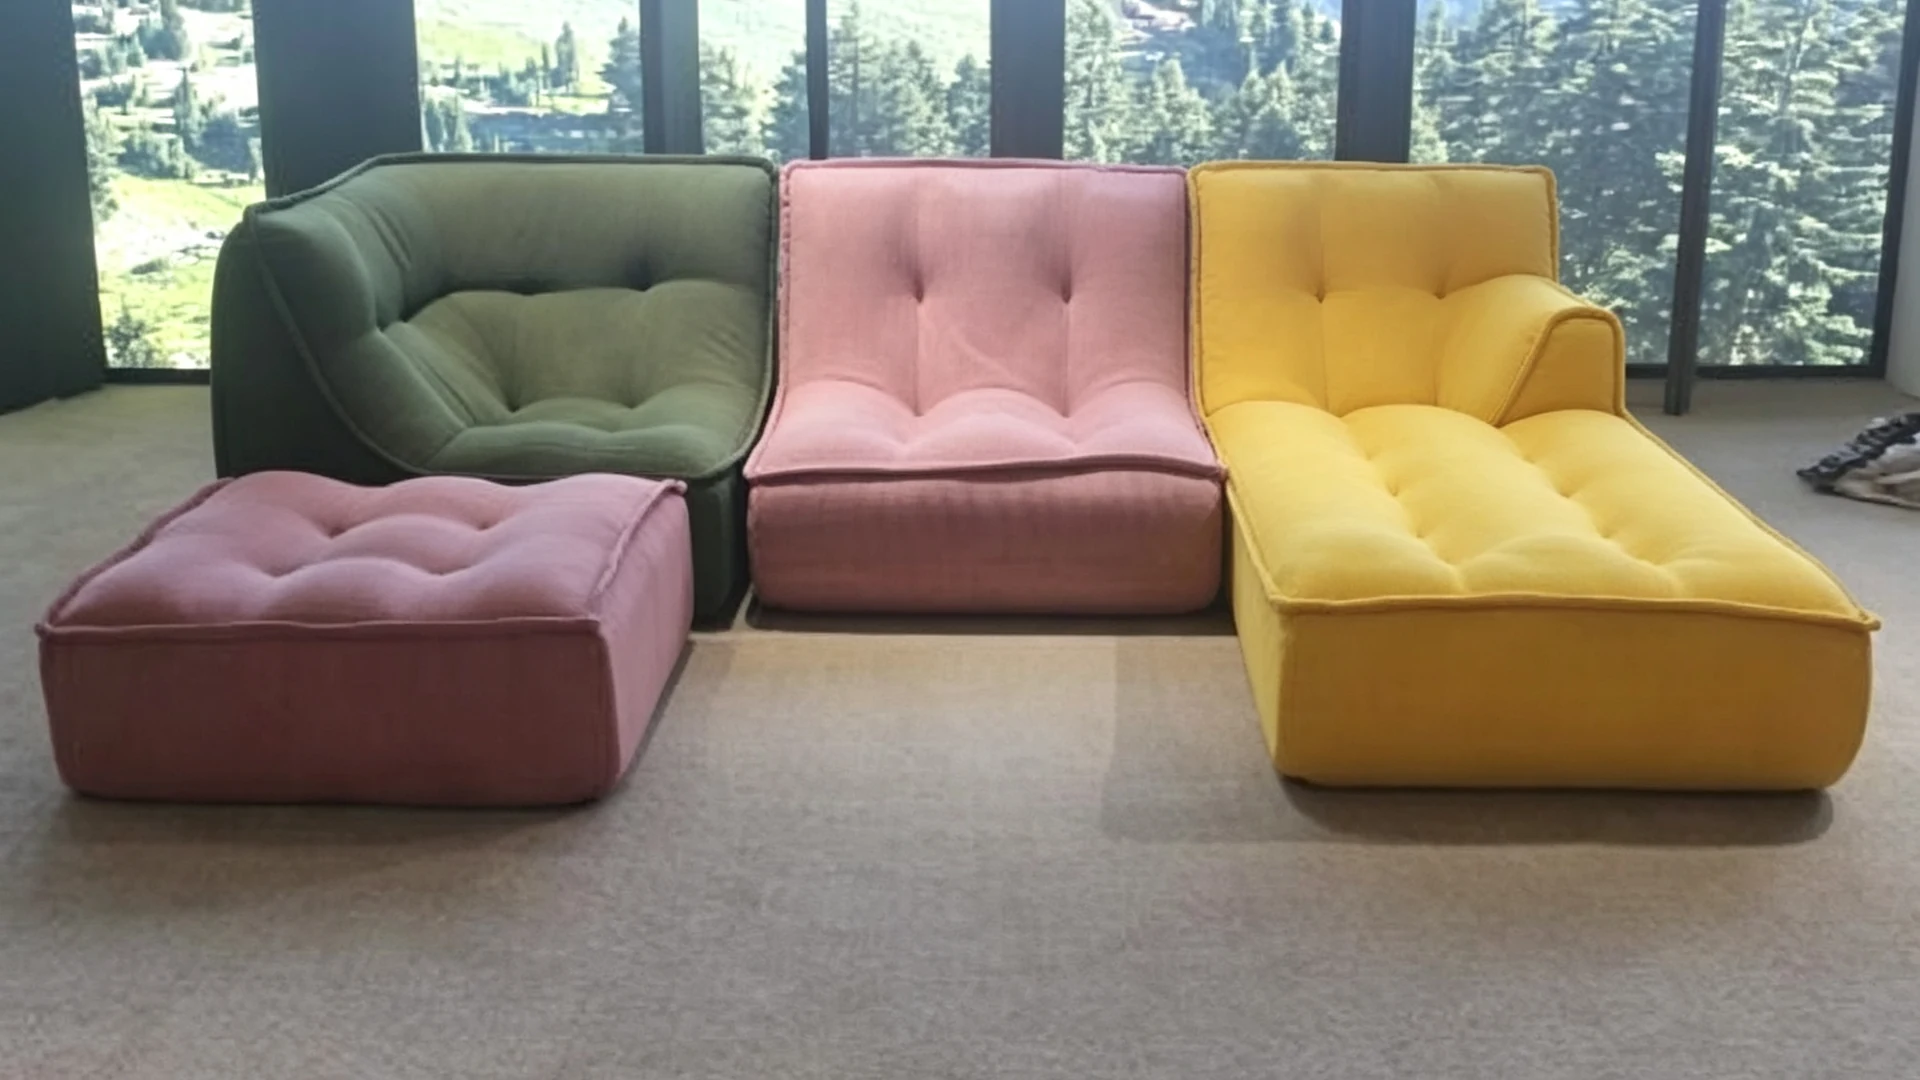
ScrapeSpace’s Multi Color Modular Floor Sofa with Ottoman includes corner, middle-seat, chaise and footstool components. Those descriptions provide a starting inventory; the arrangement and handling method must still match the supplied set.
Map the New Arrangement Using the Same Modules
Draw the proposed configuration using the labels from the original sketch. Give every section a destination and identify which neighboring pieces will change.
| Proposed change | Check before moving |
|---|---|
| Reposition an ottoman | Whether it is freestanding or attached, and whether its new position leaves access clear. |
| Relocate a middle seat | Whether the new neighboring modules provide the required connection and support arrangement. |
| Move a chaise to the opposite side | Whether the actual chaise, arm and back configuration permits that reversal. |
| Use a section separately | Whether it is designed to function independently, with suitable support and finished exposed surfaces. |
| Rotate a corner section | Whether the back, arms and intended seating direction still suit the proposed arrangement. |
Moving a freestanding ottoman can change a lounging position without changing the main sofa connections. Reversing a chaise can involve a different combination of components. Treat these as separate operations even if the finished arrangements appear similar.
Mark the proposed footprint on the floor and check access around it. Allow working space for positioning and reconnecting the sections as well as everyday space for doors, drawers and walking routes.
A useful plan shows both where each module finishes and how it reaches that position.
Release the Intended Connections Before Moving
Remove loose cushions and accessories that are designed to lift off. Clear nearby furniture and reserve space for the separated modules.
Identify the connection at each joint before applying force. Interlocking fittings, fastened brackets and freestanding arrangements require different procedures. Follow the release method for the actual fitting, including which section moves and in which direction.
Work on one joint at a time. Support the sections as instructed, release the connection fully, and move the freed piece clear before proceeding. Keep any removed hardware associated with its recorded joint.
Stop if the upholstery pulls tight, a fitting visibly distorts or the adjoining section moves with the piece you are trying to release. These signs can indicate that a connection remains engaged or that the release method is wrong.
Do not remove structural hardware simply because it is accessible. Separate the intended modules while leaving their internal construction intact. If the product includes electrical components, use its dedicated disconnection and assembly instructions before moving any connected section.
Position and Reconnect the Sections in Sequence
Follow the assembly sequence specified for the arrangement. Place the first module where it can remain while adjoining sections are brought into position.
Move each separated piece using its approved support points and suitable assistance. Keep exposed fittings clear of neighboring upholstery and protect the floor during handling. Do not carry connected sections as one unit unless the product instructions explicitly allow it.
Before reconnecting two pieces, check three things:
- Orientation: each module faces the direction shown on the new plan.
- Support: the bases or fitted feet rest as intended, without an obstruction or folded rug edge lifting one side.
- Alignment: the joining positions correspond, with upholstery and loose cushions clear of the connection.
When combining modular sofa pieces, visual alignment alone does not establish that the joint is complete. Engage all required fittings using the specified method and check the connection before continuing to the next section.
Do not force a fitting to compensate for a mismatched pairing. Likewise, adding an improvised bracket does not establish that an unsupported layout is suitable for use.
Check the Finished Arrangement Before Sitting Down
Return cushions to their corresponding modules and inspect the sofa from several sides. Account for all required connections and any hardware removed during the change.
Compare the result with the original photographs where helpful. A cushion returned to the wrong location can resemble a module-alignment problem.
| What you notice | What to check |
|---|---|
| An unexpected gap between sections | Module orientation, positioning and complete engagement of the intended connection. |
| One section appears higher | Floor conditions, base placement and any feet disturbed during handling. |
| Cushions no longer fit properly | Whether each cushion has returned to its corresponding module and orientation. |
| A fitting will not engage | The selected module pairing, fitting position and any visible damage. |
| A detached section feels unstable | Whether it is approved for independent use and correctly supported. |
An unexplained gap is a reason to inspect the arrangement, not a reason to push harder. If a fitting remains uncertain or a component appears damaged, keep the affected seating out of use until the cause is resolved.
Complete any stability or connection checks specified by the manufacturer. Then confirm that the new arrangement still allows normal access through the room.
Keep a Record of the Layout That Works
Photograph the completed arrangement and update the module sketch. Retain the relevant assembly instructions and note which cushions belong to each section.
For retailers, showroom teams and installation crews, this record makes an approved configuration easier to reproduce. It also provides a useful reference when a customer asks why a particular component cannot move to another position.
To confirm a ScrapeSpace arrangement, send the product reference together with the current and proposed layouts. Include photographs of the relevant connections and identify the sections you want to move. That information allows the discussion to focus on the actual components and the specific change required.